DIY Install of the Growatt SPF 5000 ES
Below you will find some photos and a video I took of my DIY install of a Growatt SPF 5000 ES. This is a highly efficient unit that supports 6Kw of solar input and 5Kw of AC output. You can “Parallel” up to six of these Growatt units to allow you to have up to 30Kw of AC output. The system uses a 5Kw transformer that allows the Growatt to produce “220 Split phase”.
Features:
+ Integrated MPPT charge controller. 18A 450V input
+ Equalization charging function.
+ Work with battery or without battery.
+ Maximum PV input voltage up to 450VDC.
+ Configurable grid, battery or solar input priority.
+ Optional WIFI/ GPRS remote monitoring.
+ Supports parallel operation for capacity expansion up to 30kW.
+ PV and Grid power the load jointly if PV energy insufficient
+ The 5000ES can work without batteries.
Downloadable copy of the Manual: https://workdrive.zohoexternal.com/external/5NOLY0MgjJf-M7rSB
The maximum power PV input voltage up is to 450VDC (volts open circuit), and each stackable unit can take up to 6000W of solar power.
You can connect Utility power (Street Power) to the input and power using that, if solar is not enough to power a load. This allows you to use the unit as a “Battery backup” for your house.
NOTE: a split phase transformer is needed to make 120V Loads possible, we sell a kit with it as well as the transformer individually. at least 1 transformer is needed per stack of inverters.
See installation notes at the bottom of the page for things to watch for during your install.
https://tennesseevalleysolar.com/what-not-to-do/
We have created a special learning section for our site that contains a lot of articles, videos, and more information in relation to all things solar.
For even more information about solar configuration, Click Here to Read More.
Tips and Installation Notes
This inverter is designed and sold for a DIY installation. Because of this, it is up to you to fully understand the ins and outs of this equipment. Read and fully understand the manual before starting. Incorrect installation WILL cause problems. Make sure you change the settings on the inverter to be right for your installation. You will need a working Multimeter and you will need to know how to use it.
Damage caused by incorrect or poor installation will be your responsibility. Please remember that just because it doesn’t work the way that you think it should does not mean that I sold you junk. This equipment is complicated and can be confusing to install. We have had customers who have had issues with their installs and jumped to assuming that the issues were caused by a defective unit which had been damaged by the customer.
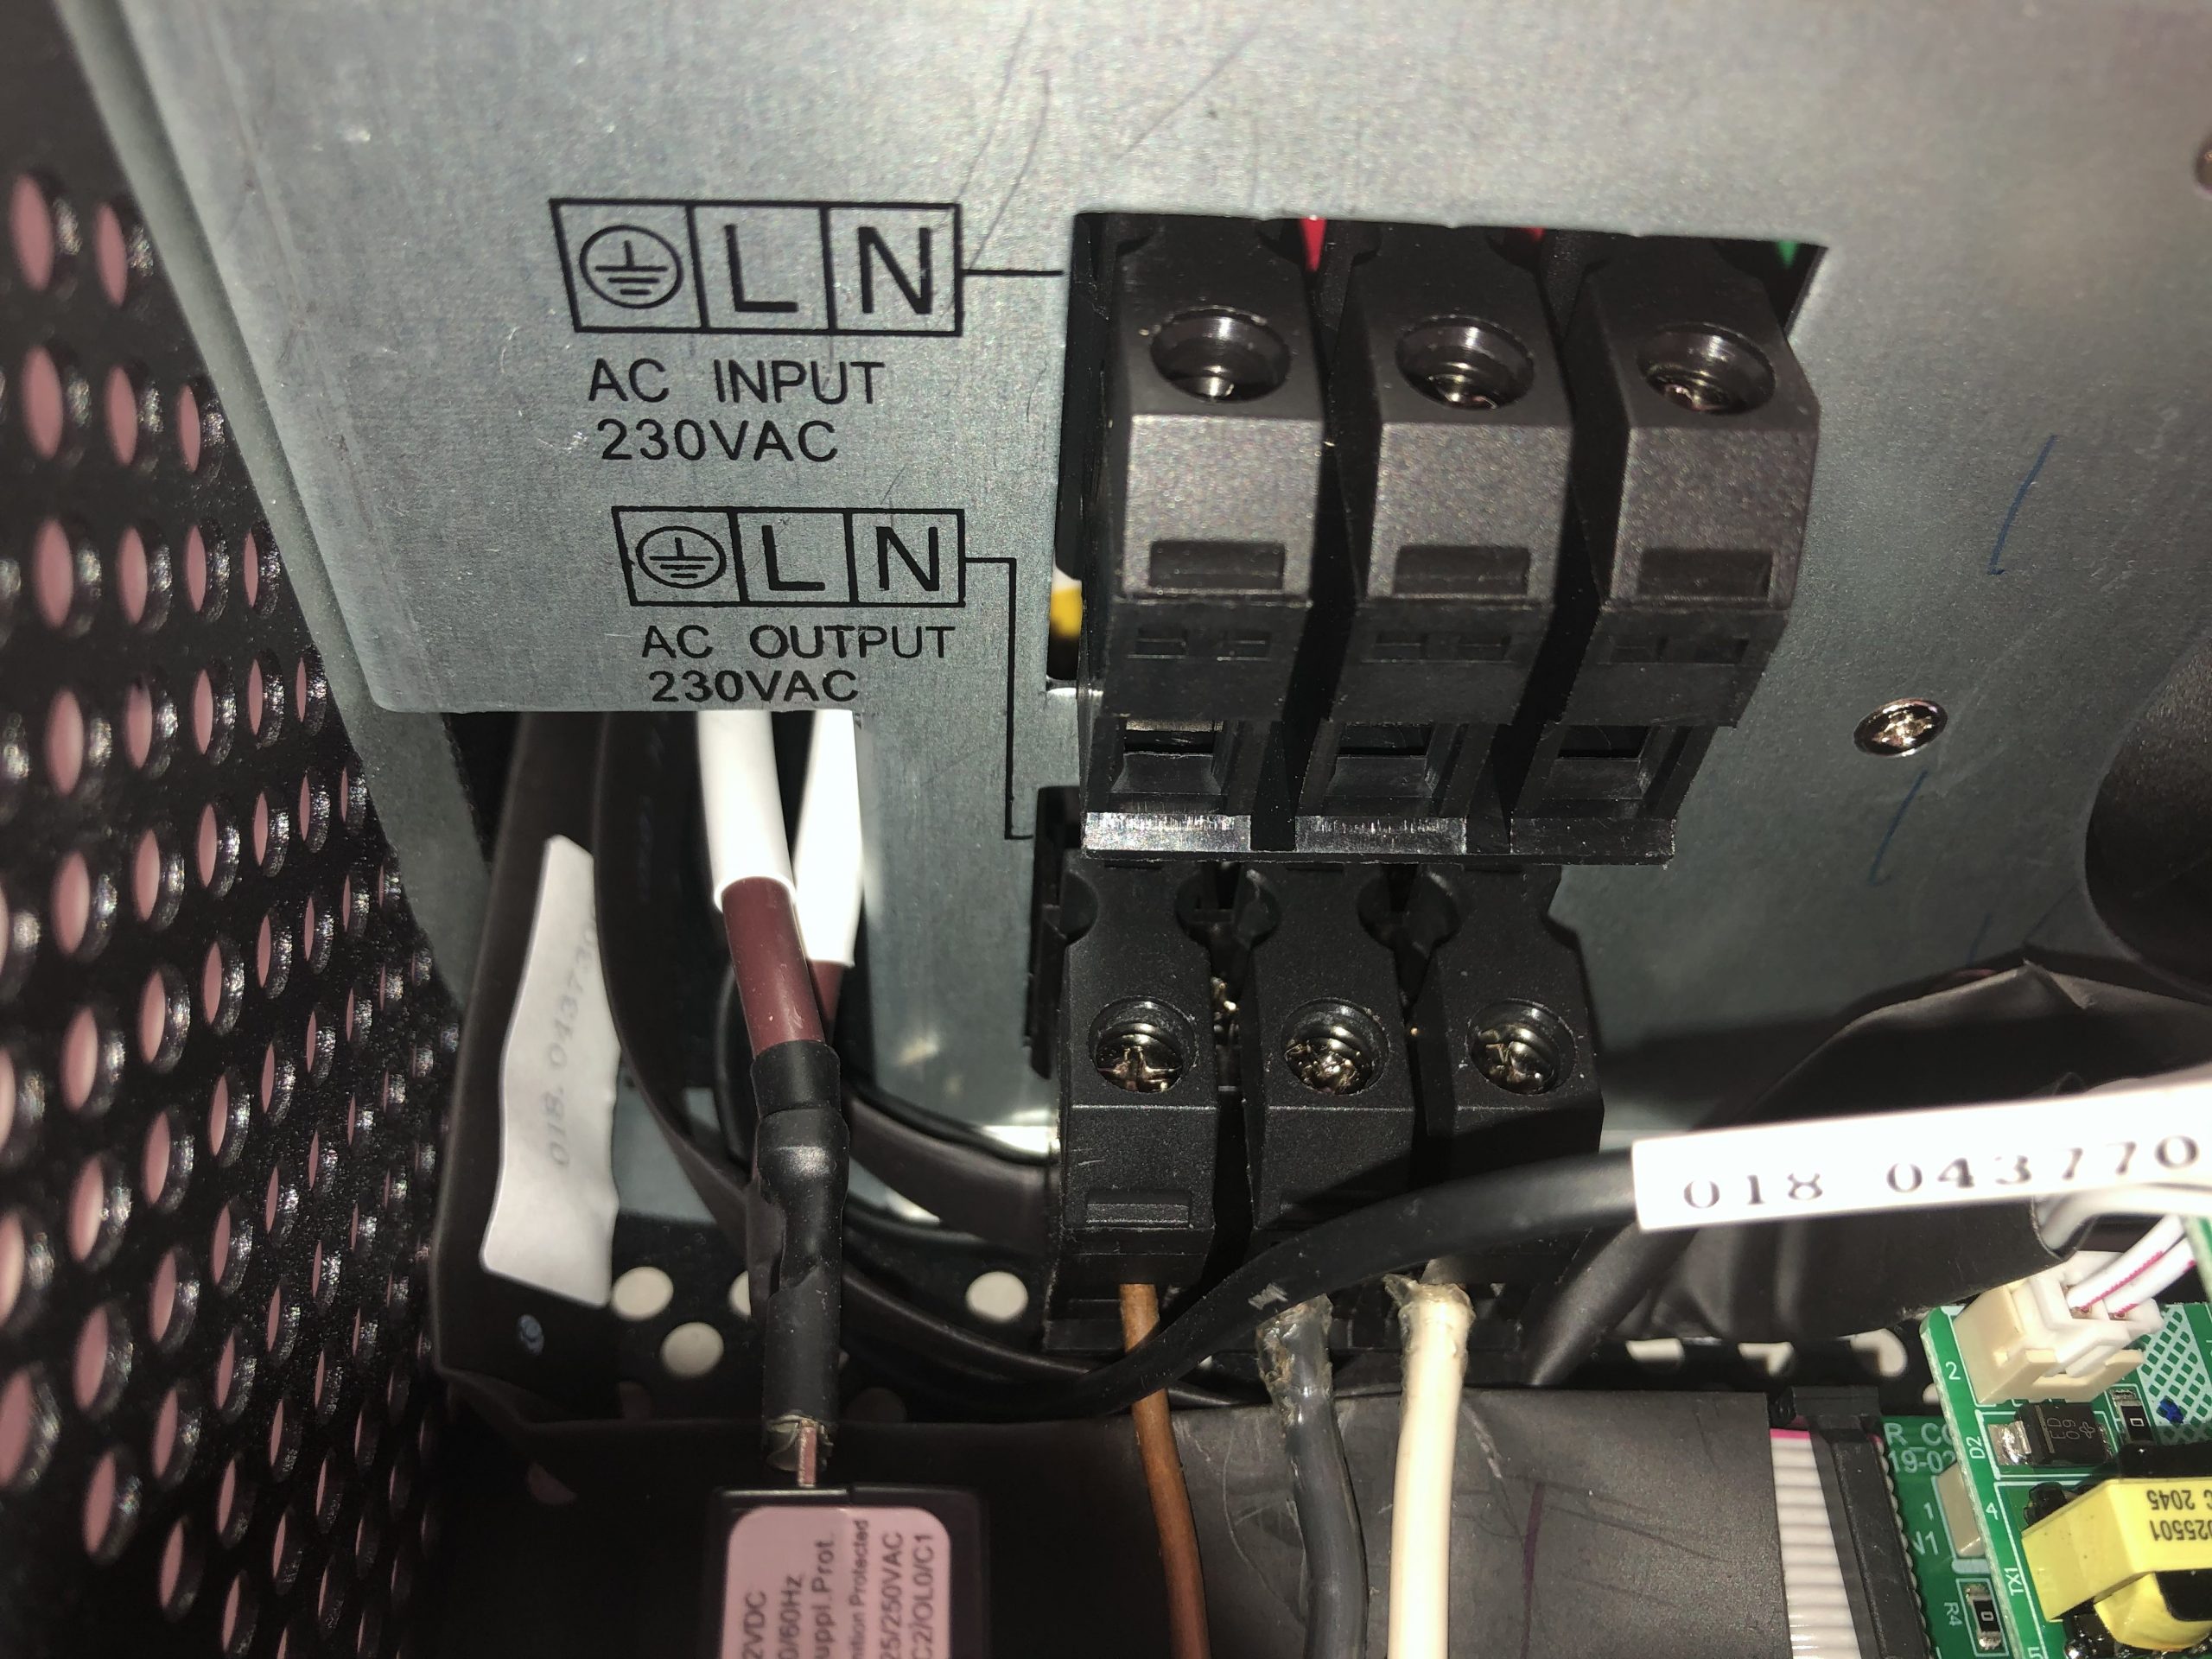
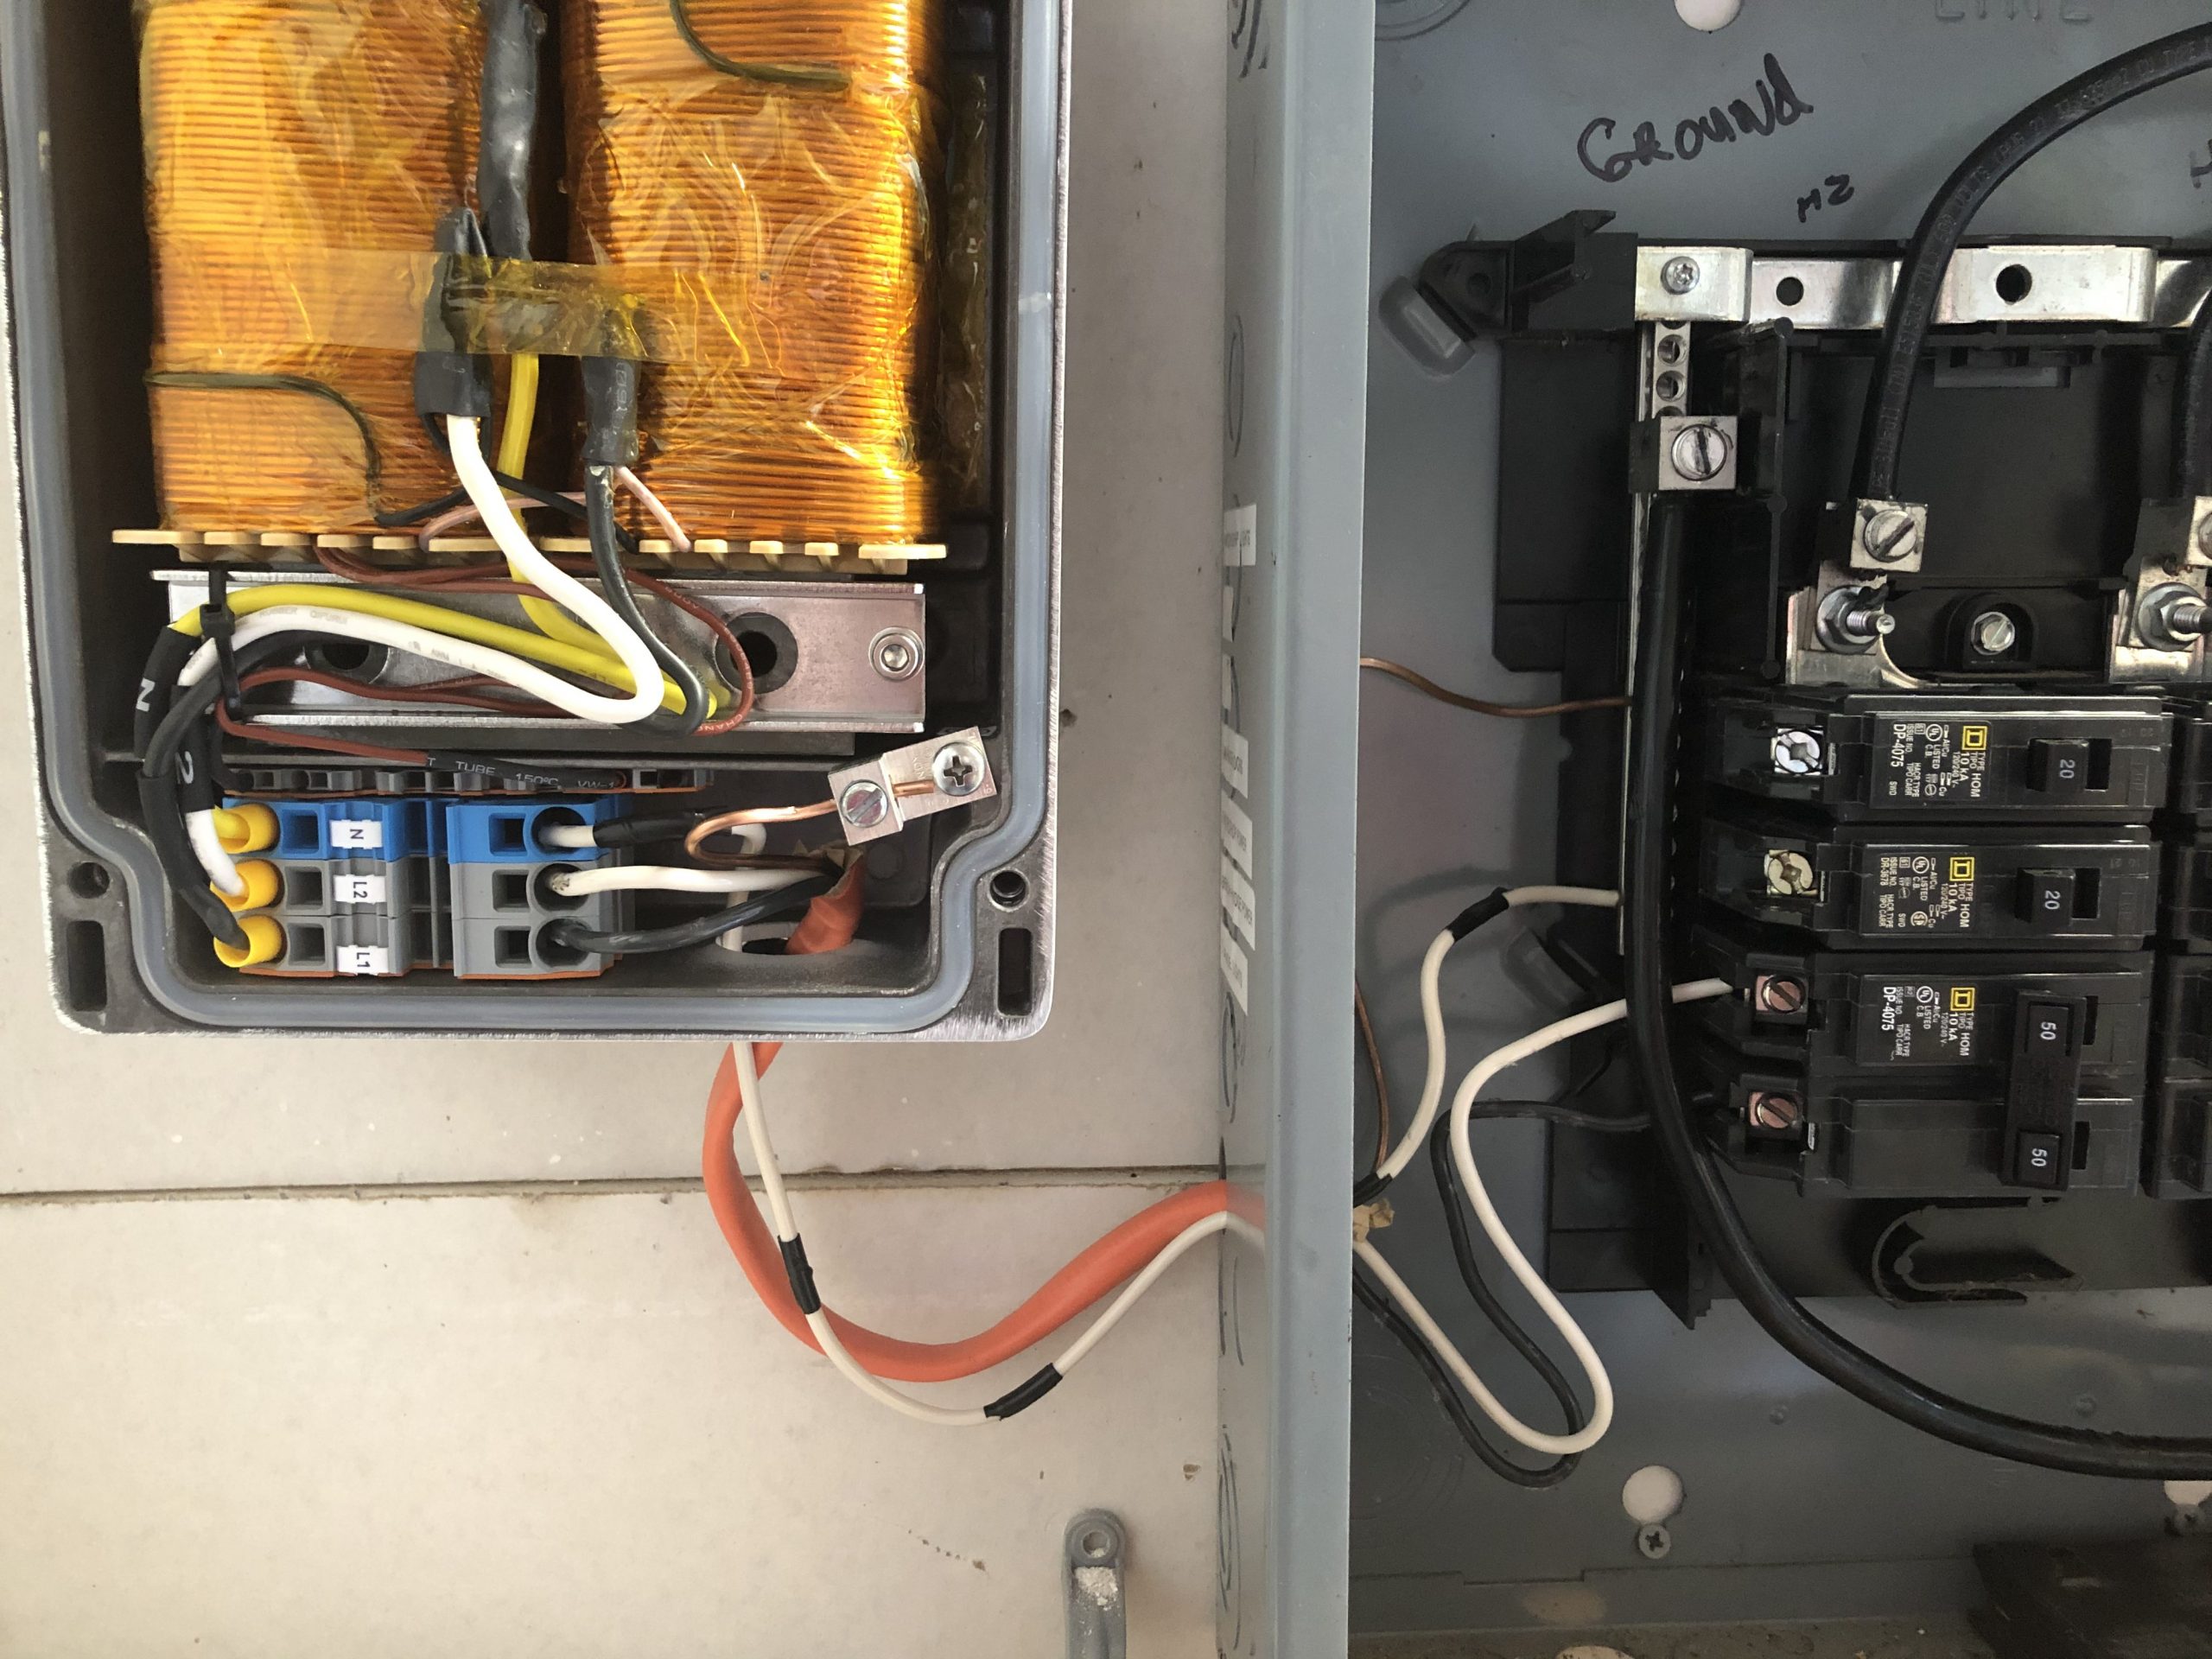
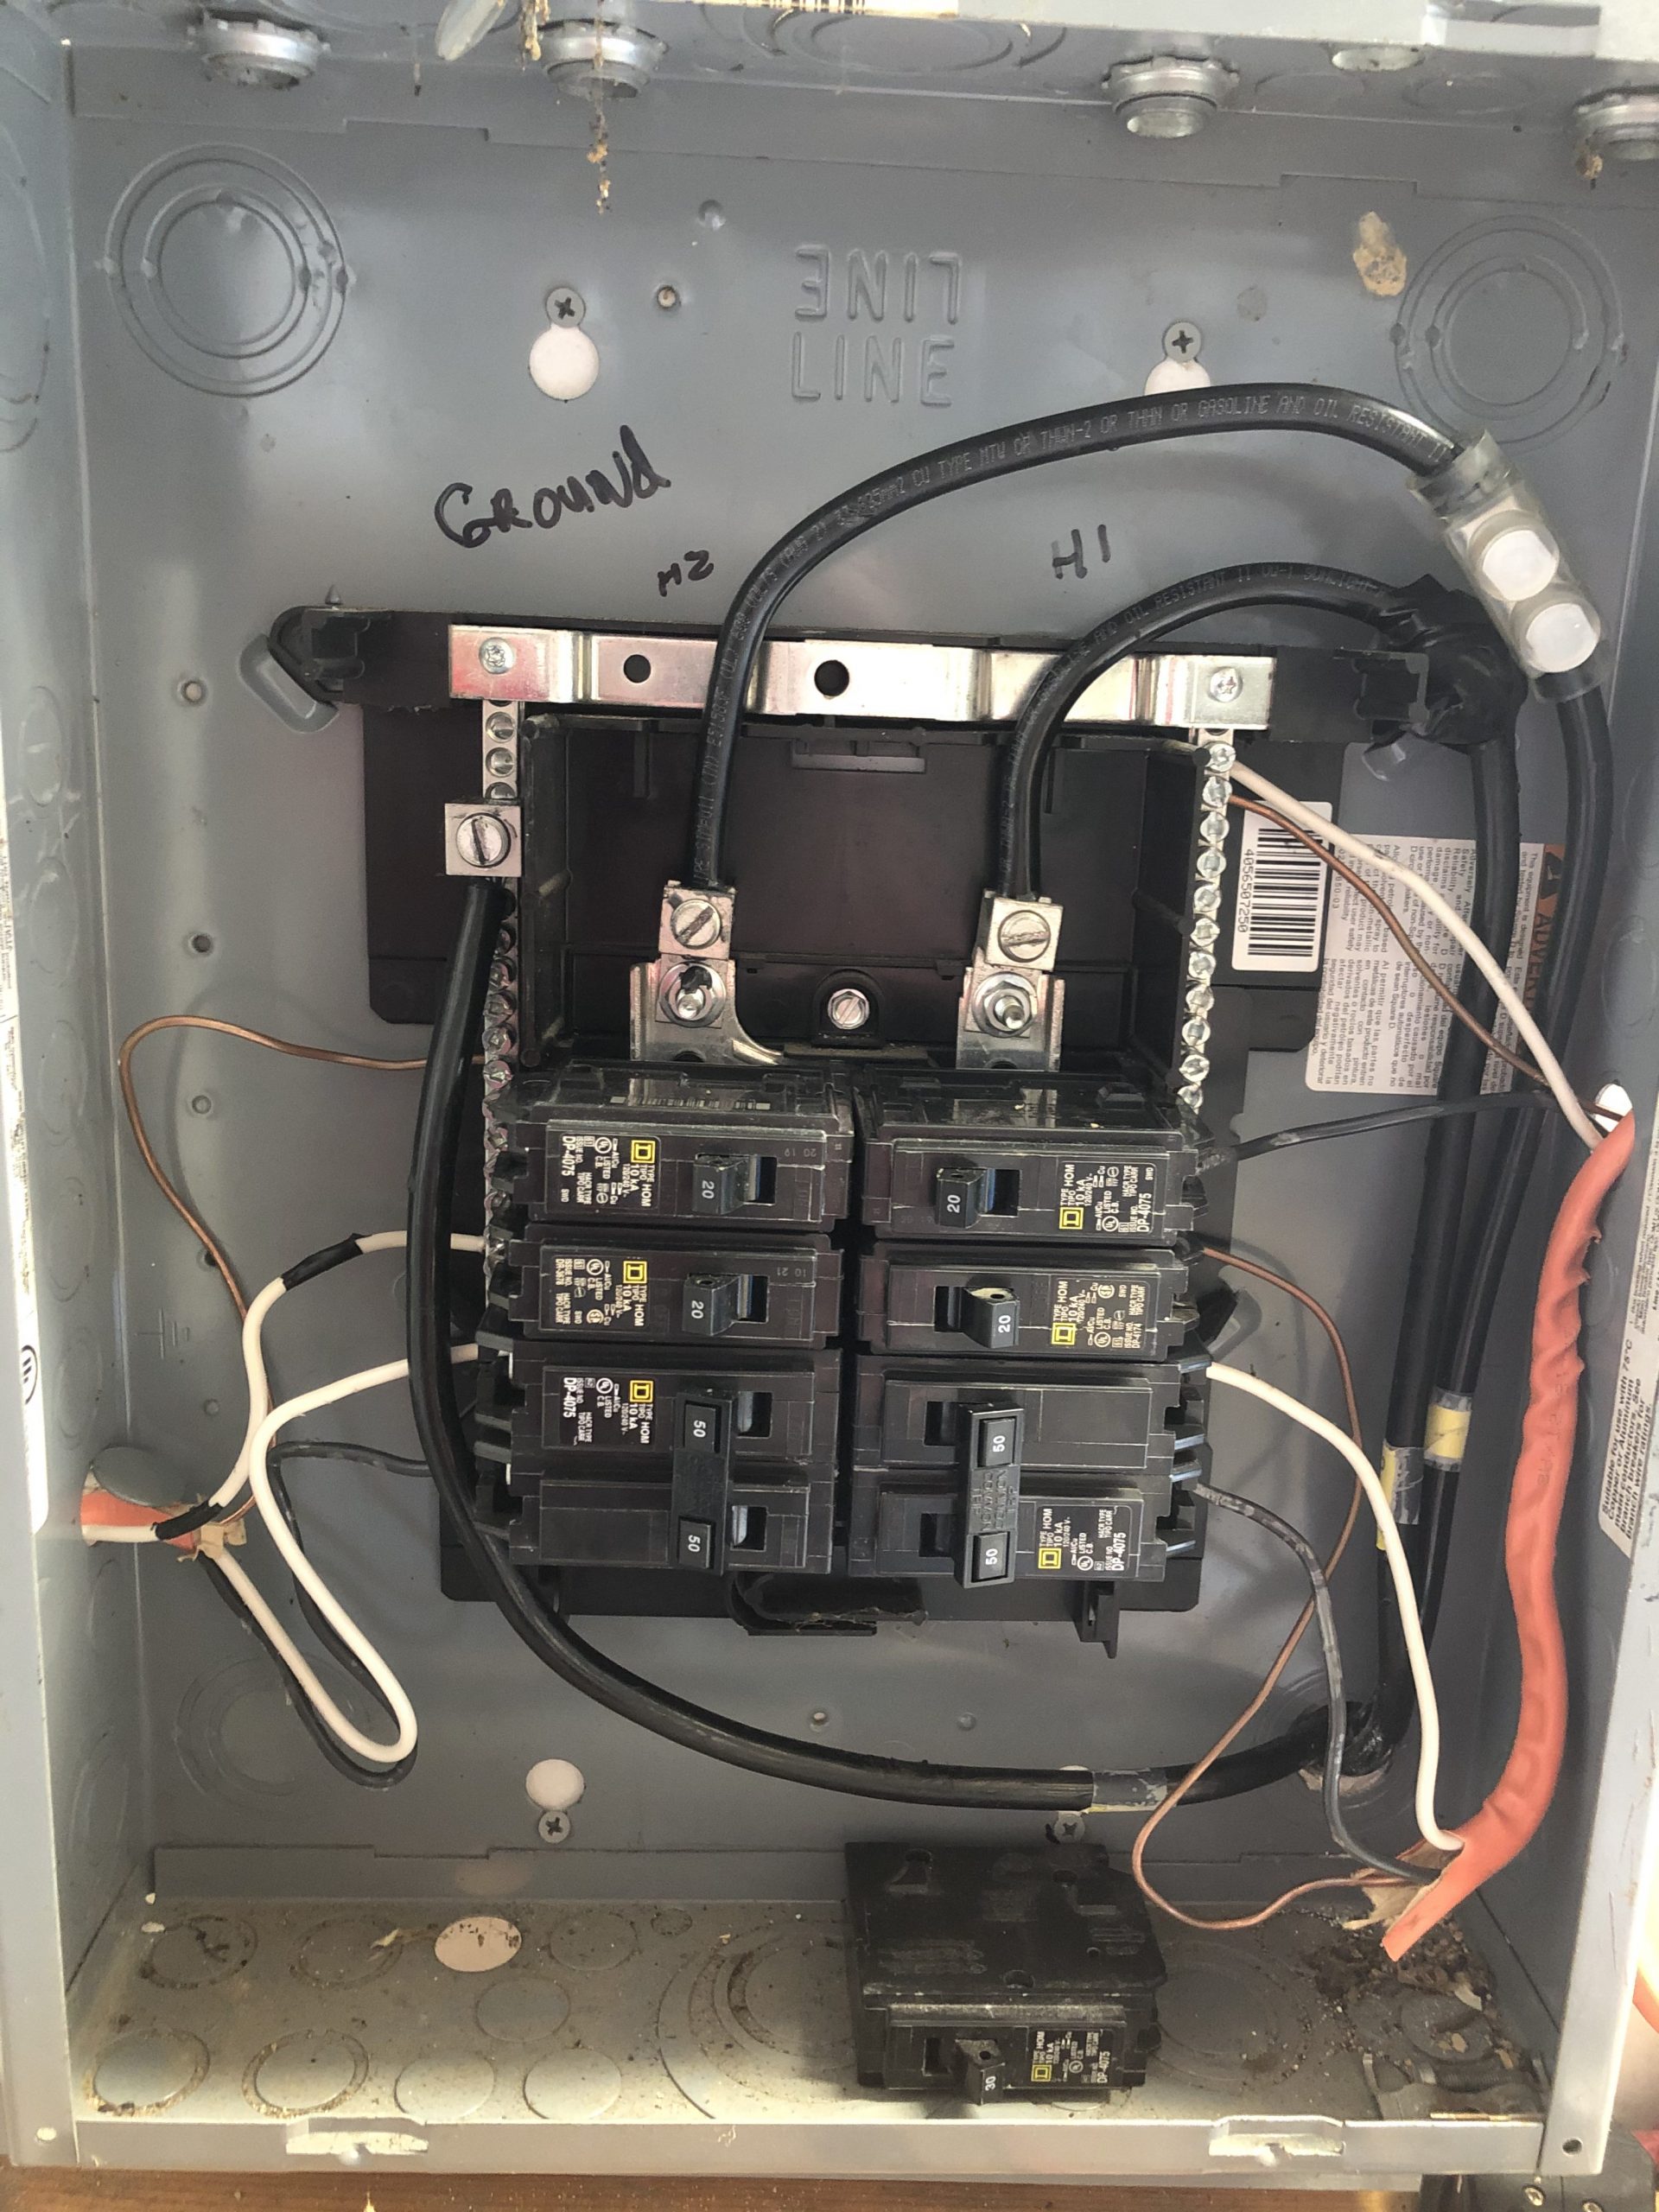
- The SPF 5000 ES and the Transformer each connect to their own double pole 50 Amp breaker (Photo 8)
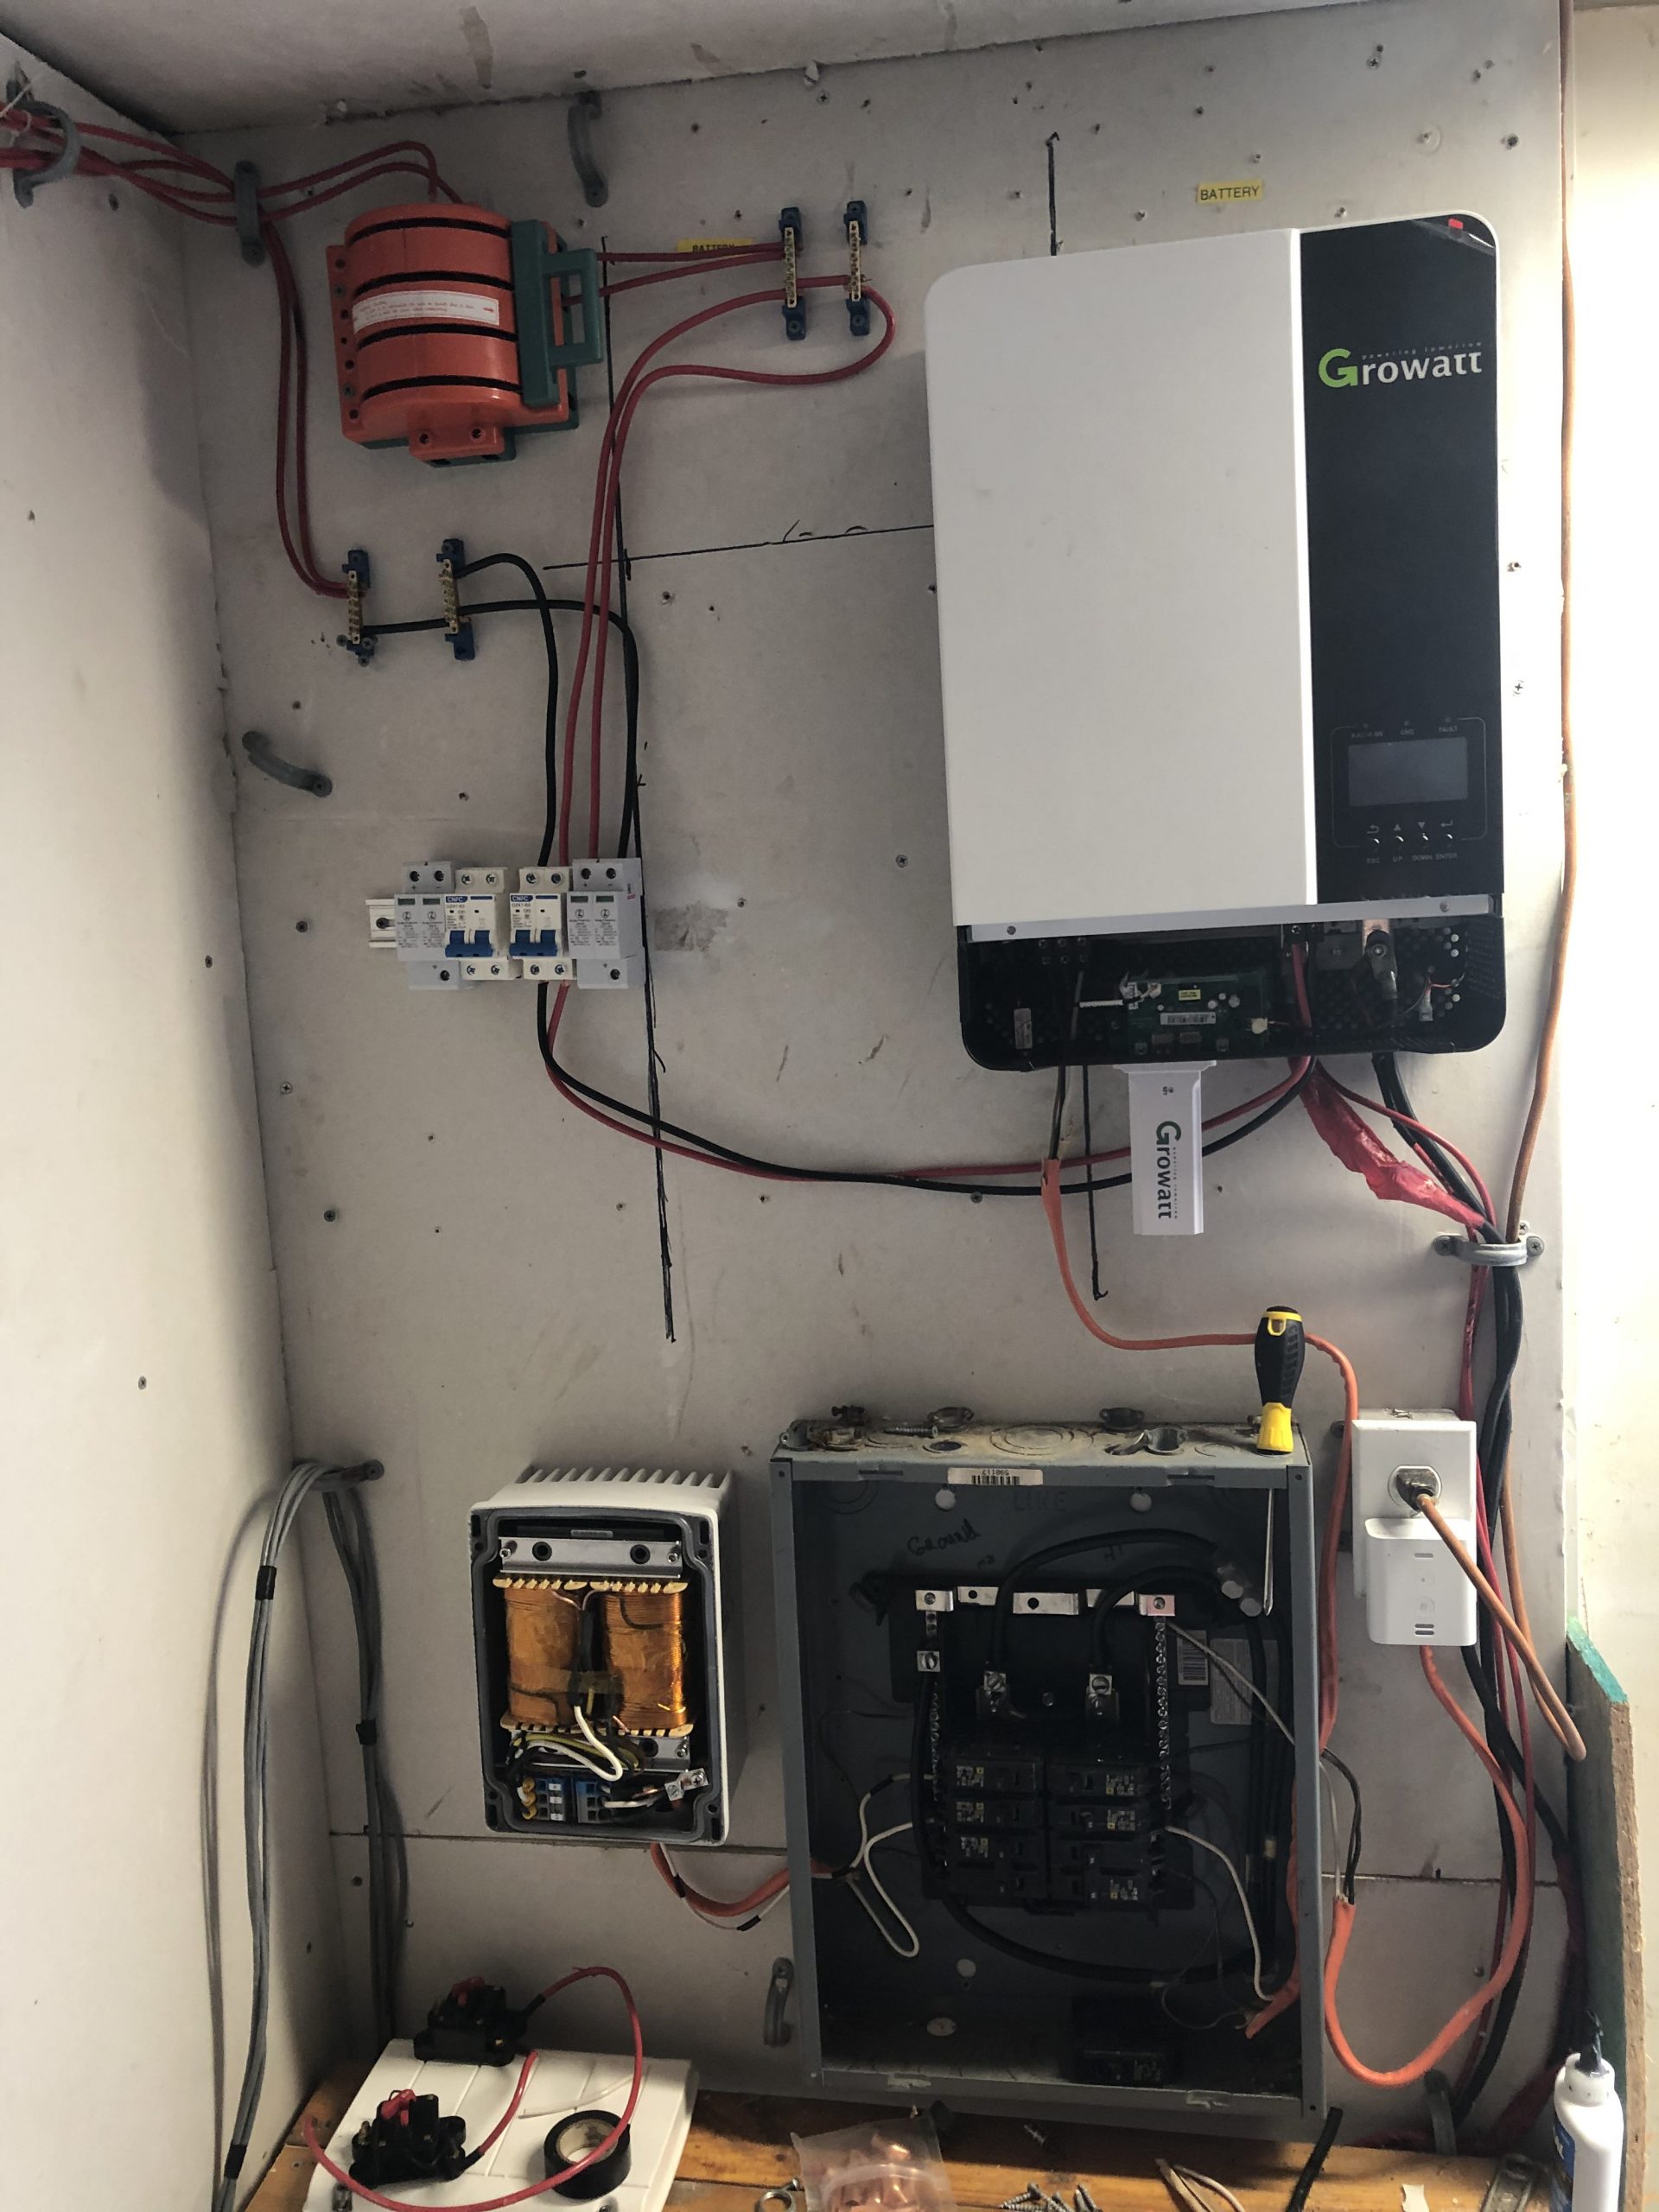
- You should have a breaker between your panels and the inverter. (Blue/White box on left side of Photo 2) Also, have a breaker between the Inverter and your batteries.
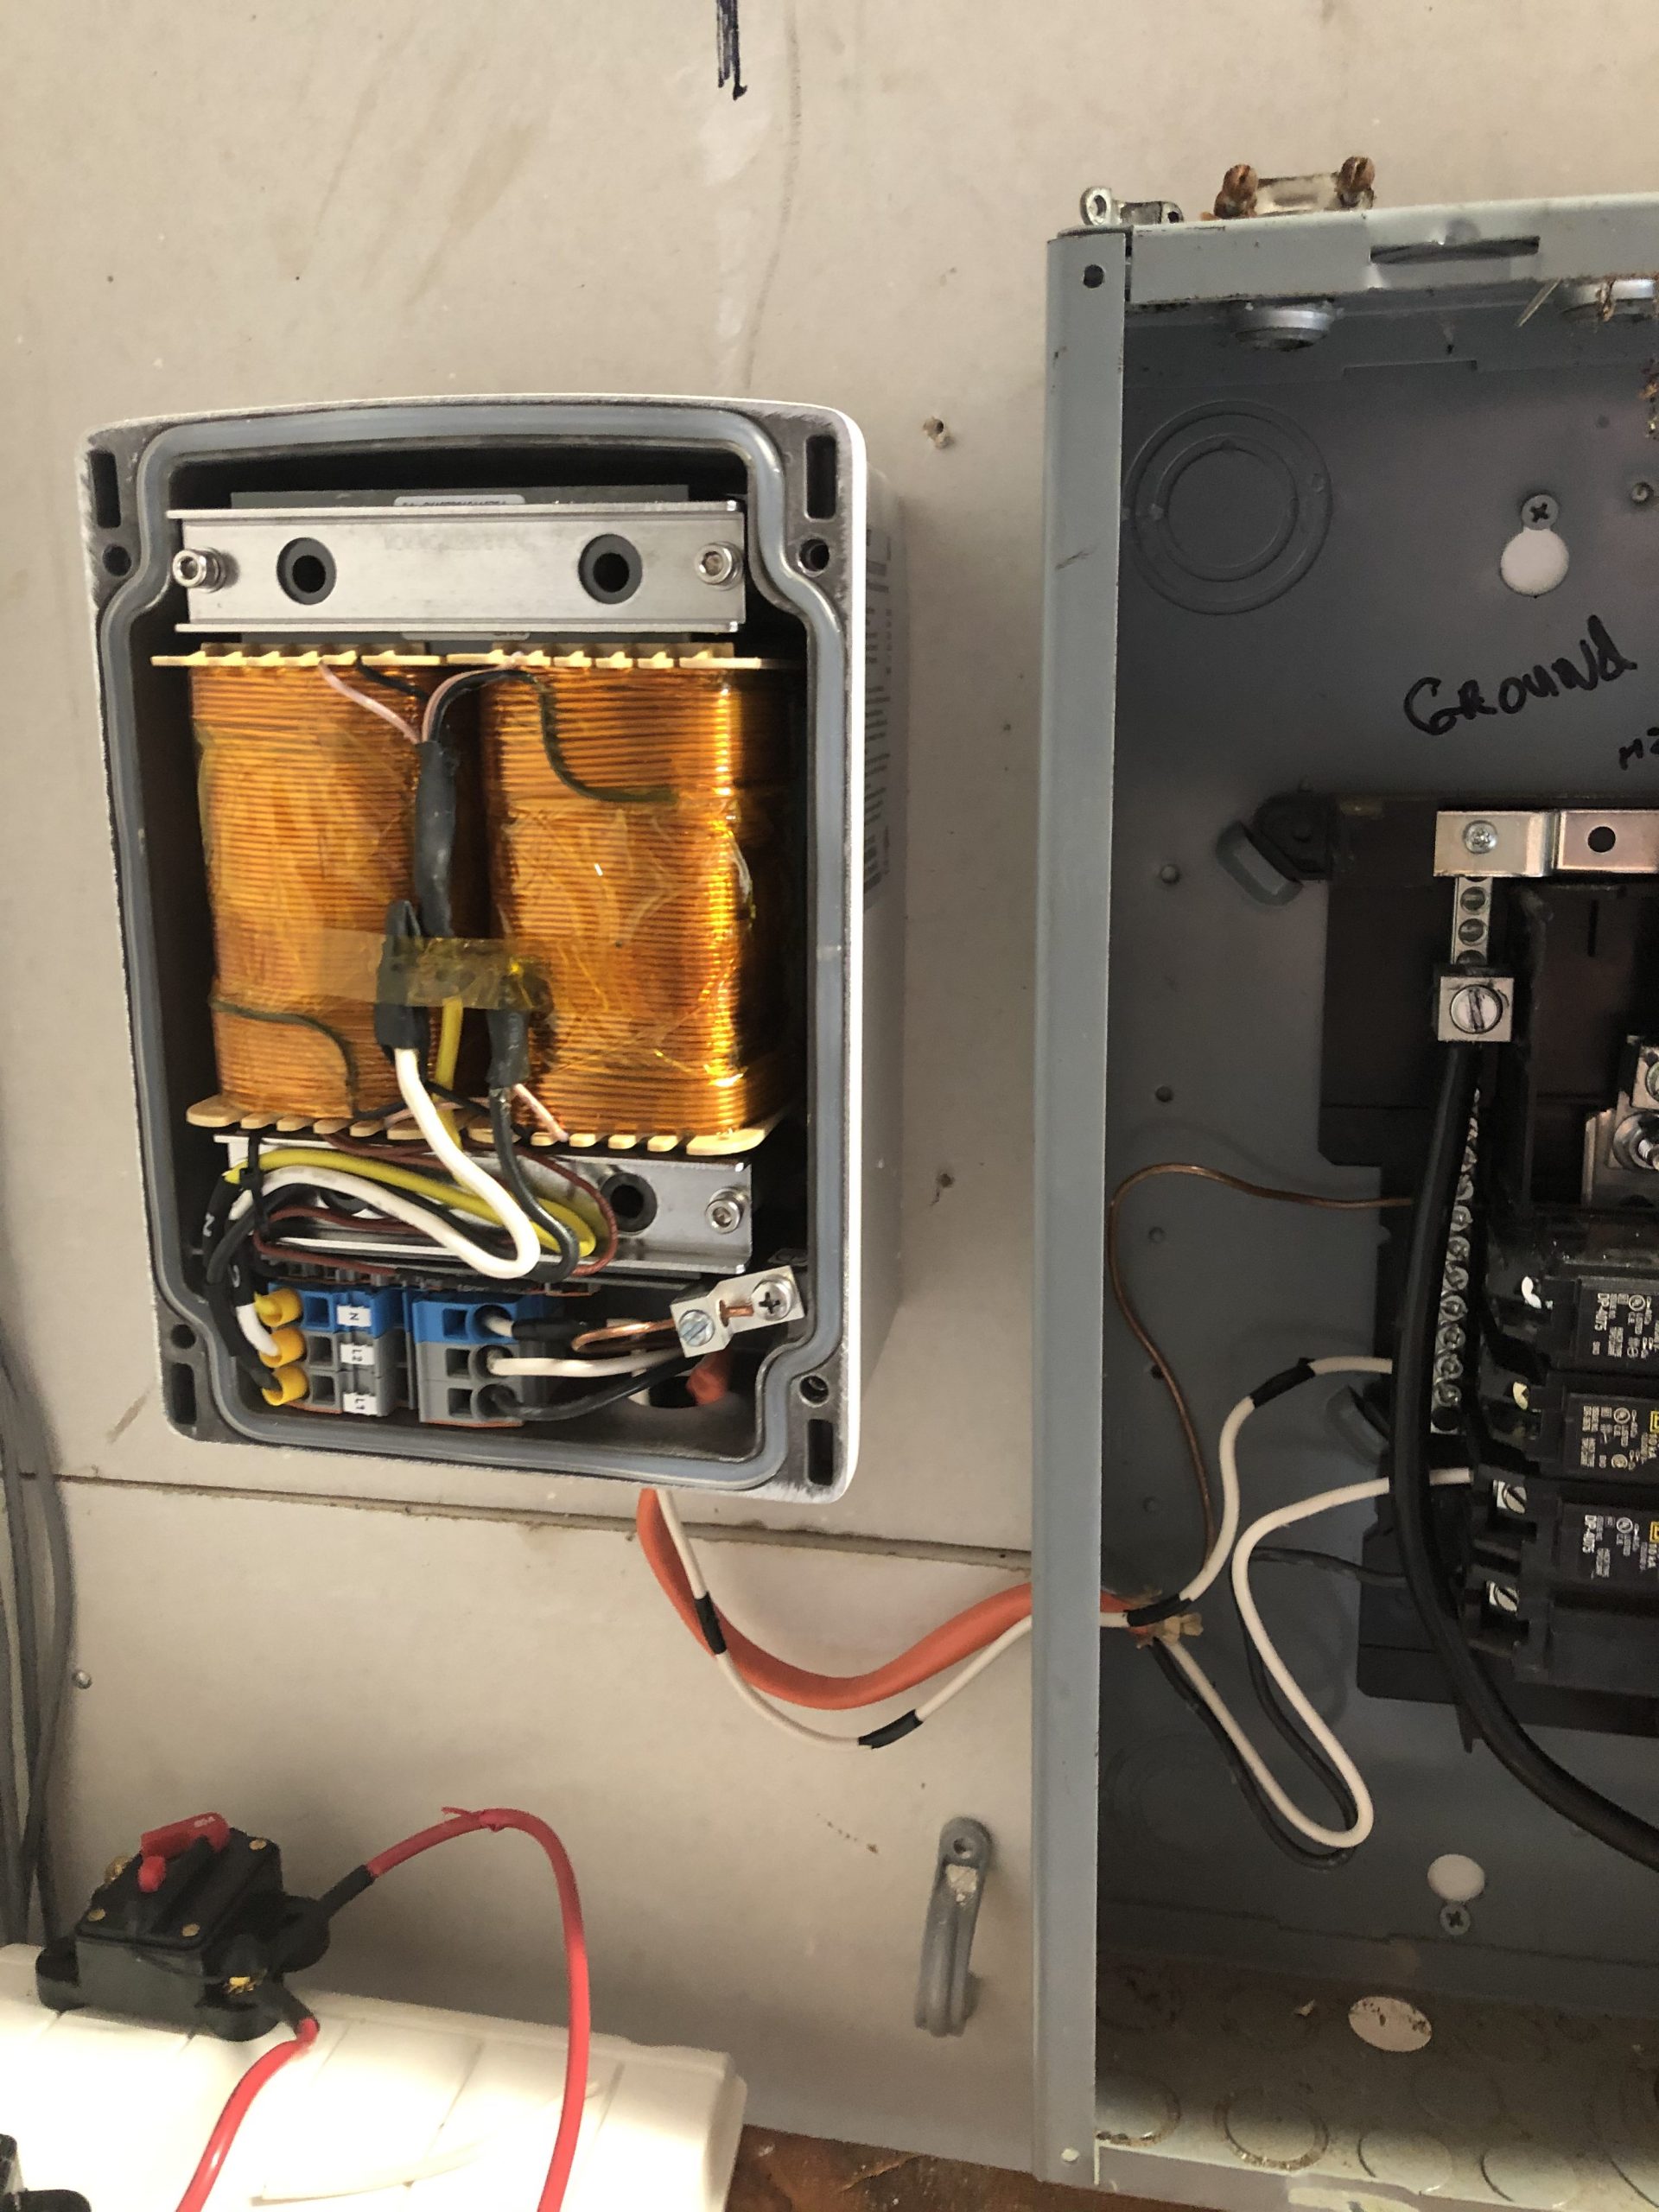
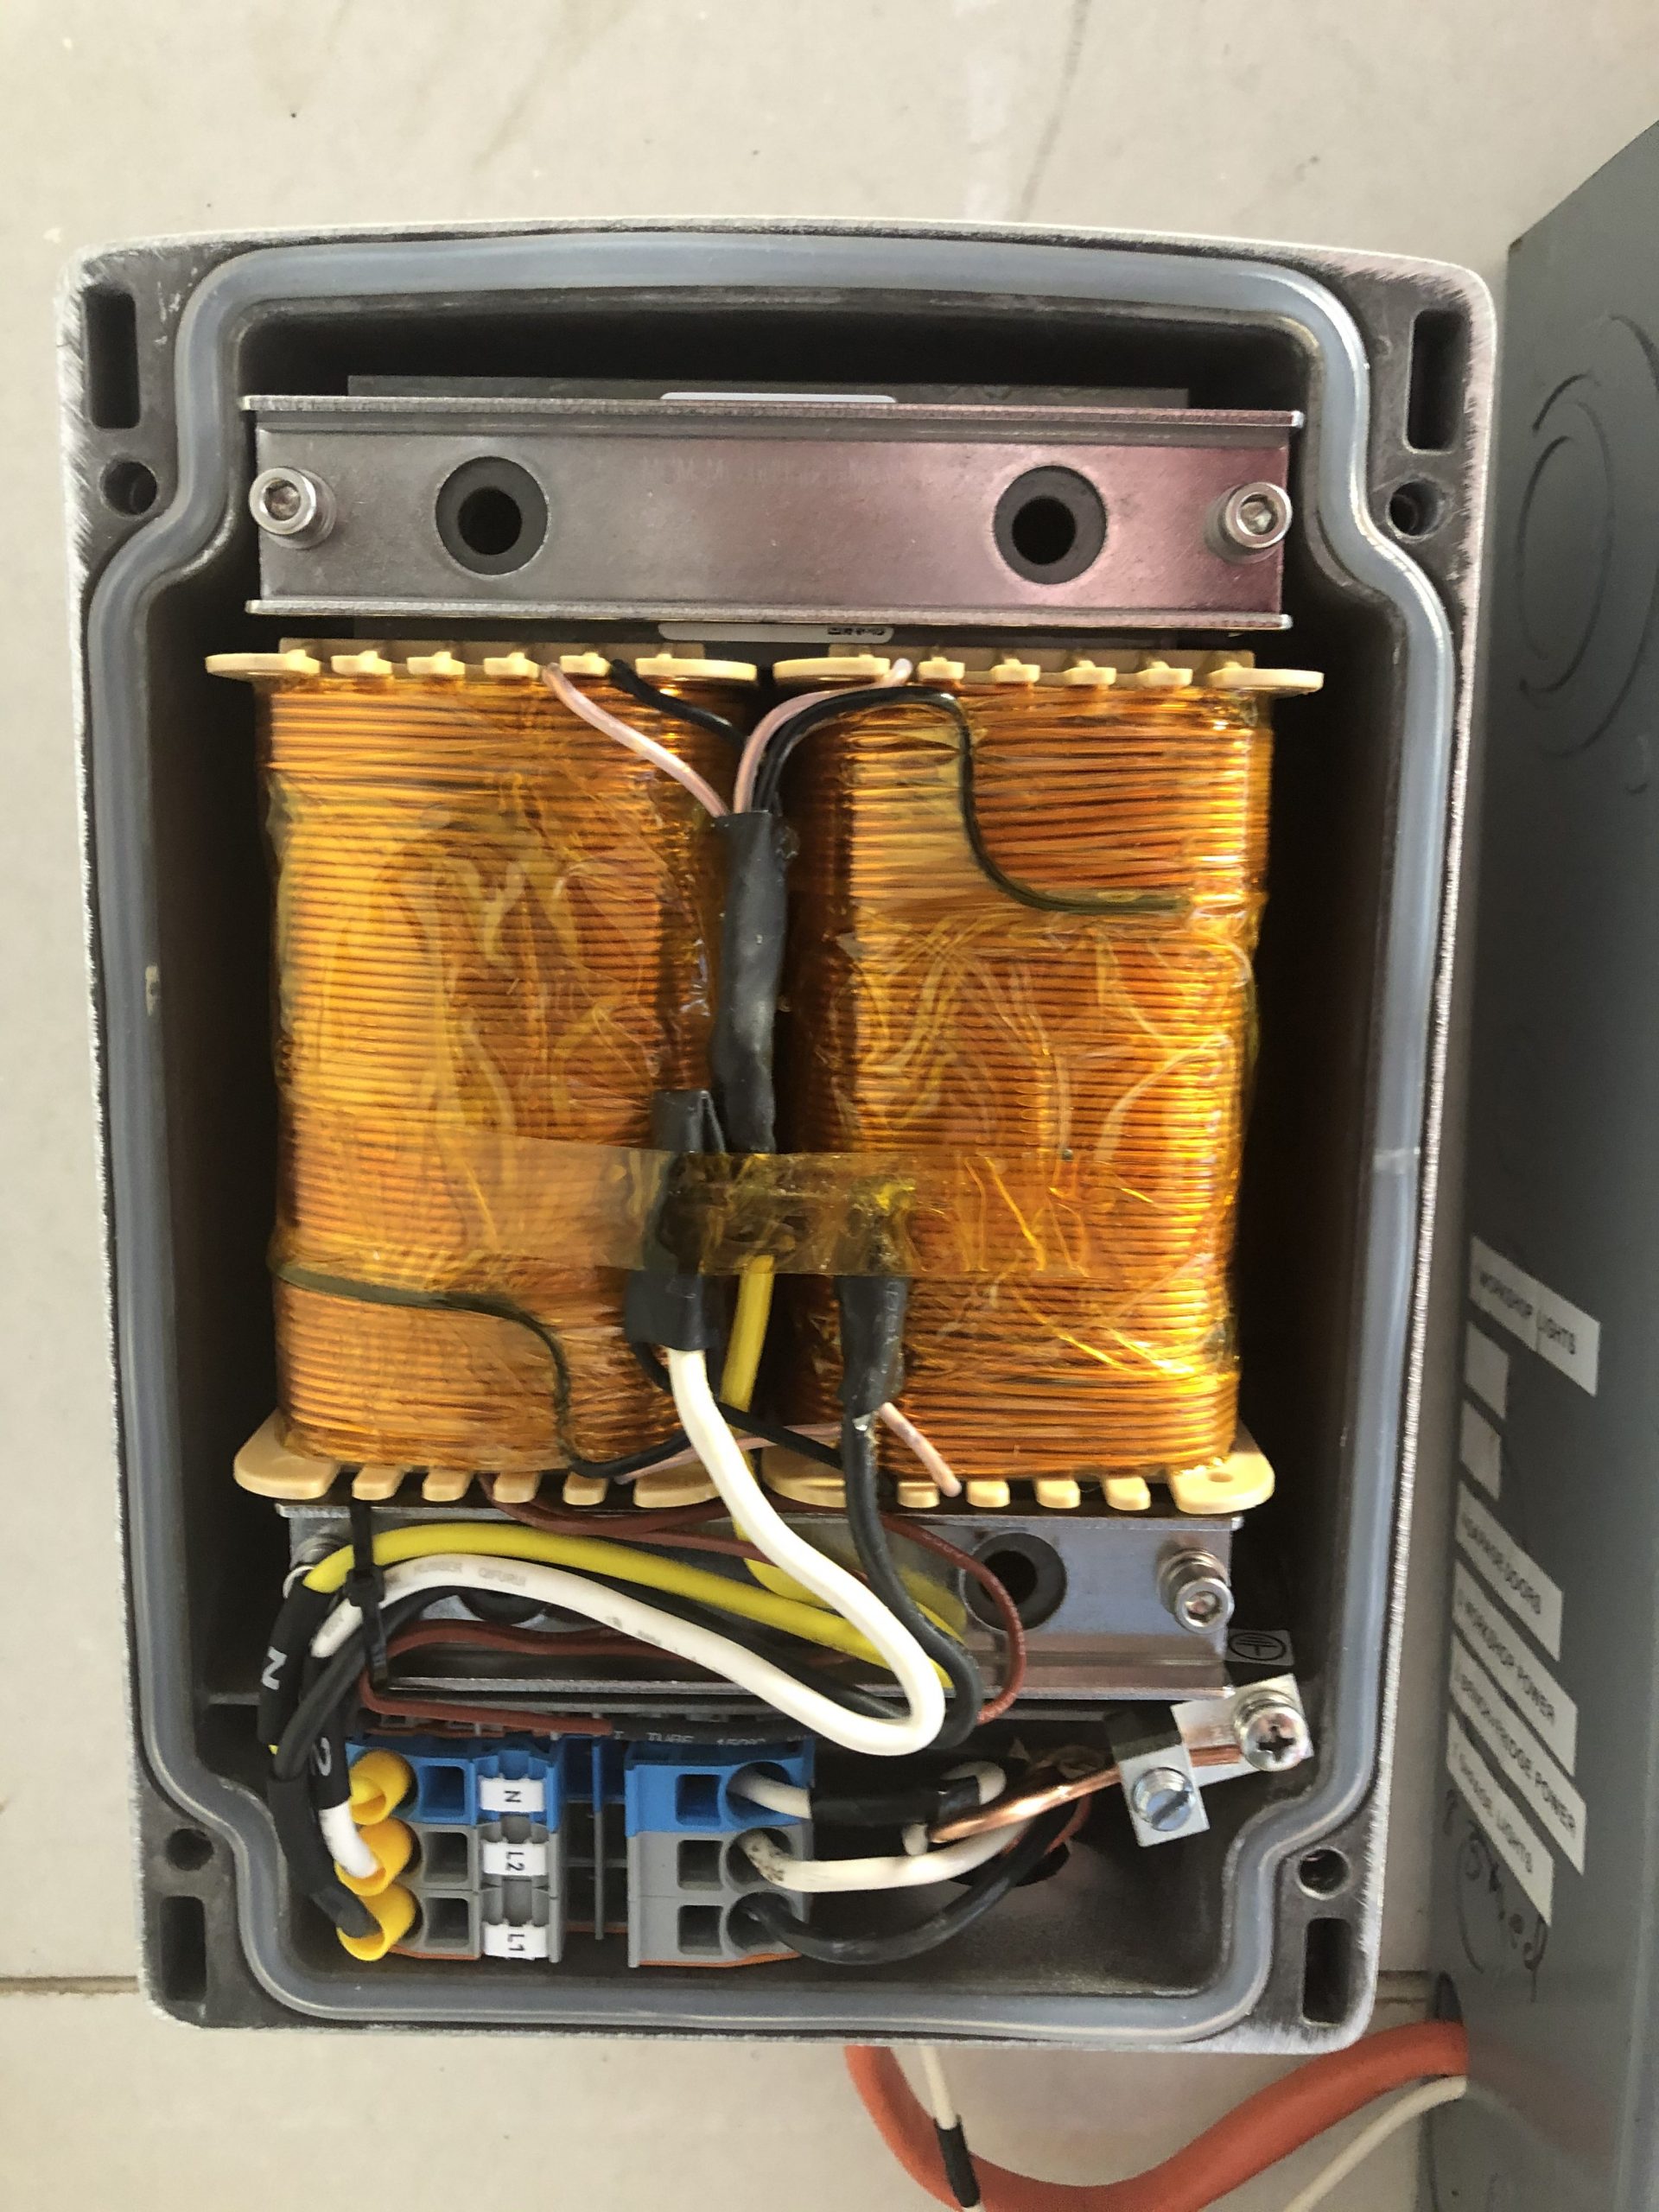
- The transformer is wired to the breaker box with L1 and L2 on the transformer going to the double pole breaker. Then I have the neutral and the ground wired to the ground bar. Separate these if you have separate ground and neutral bars. (Photo 6)
- For the AC input and output you will need to wire the connections labeled ‘L’ and ‘N’ to your double pole breaker. On the inverter, they should be labeled as L1/L2 as both the ‘L’ and ‘N’ connect directly to the double pole breaker. (Photo 4)
- If you are going to have another SPF 5000 ES Unit wired in “Parallel”, it will need to be connected to it own (separate) double pole 50 amp breaker. You will need to make sure that the second unit is wired EXACTLY THE SAME WAY as the first unit. If you have ‘L’ on the inverter going to the top pole of the breaker on the first unit, then do the same thing on the second unit. Do not cross wire the units!
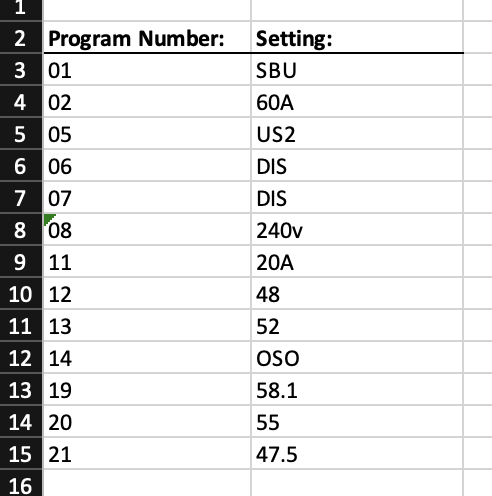
- Changing the settings is one of the most important steps to installing this inverter. After getting your SPF 5000 ES setup, you MUST go into the settings program on the LCD screen and change the unit to use 60 Hz in program 09 (Bottom right of Photo 11). Other Settings we suggest to use when setting up for off-grid use are in Photo 12.
- Please note, the settings above are for Flooded Lead Acid Deep Cycle Batteries. If you are using Lithium Batteries with a BMS connection (Network cable from battery to inverter), you would want to set Program 05 to “LI” and Program 36 to “L01”.
- I would suggest going through the setting section of the manual and marking what settings you need to change. (Photo 11)
- Your solar panel string voltage needs to be greater than 120V DC. If you have 30 volt panels, I suggest having at least 5 of them in series which would have your string voltage at 150V. The voltage of the panels can drop when the panels are under load so I would suggest using 5 of them.
- You should bring your strings in and combine them in a combiner box or bus bars. This puts the strings in Parallel with each other. (Top left of Photo 2)
- For the SPF 5000 your batteries MUST be in a 48 volt configuration. For a lot of people, this means putting 4 12V deep cycle batteries in “series”. This would mean connecting the batteries end to end positive to negative in a long string. The inverter can also work with 48 volt Lithium battery packs such as ones sold by Rocket City Solar. However, the Inverter can also be used with out any batteries at all, which would only give you solar power but no battery power.
- This inverter has an AC input that can be used to power your house and charge your batteries. You can connect this input to “Street/Grid” power or you can connect the input to a generator. We have been warned that generators can make VERY “dirty” power that can damage the inverter. If you are looking to use a generator on the input, you may want to look into some kind of line filter or something to clean the power. Or you can hook your generator up to separate 48v battery chargers which will help to protect the inverter from power spikes coming from the generator.
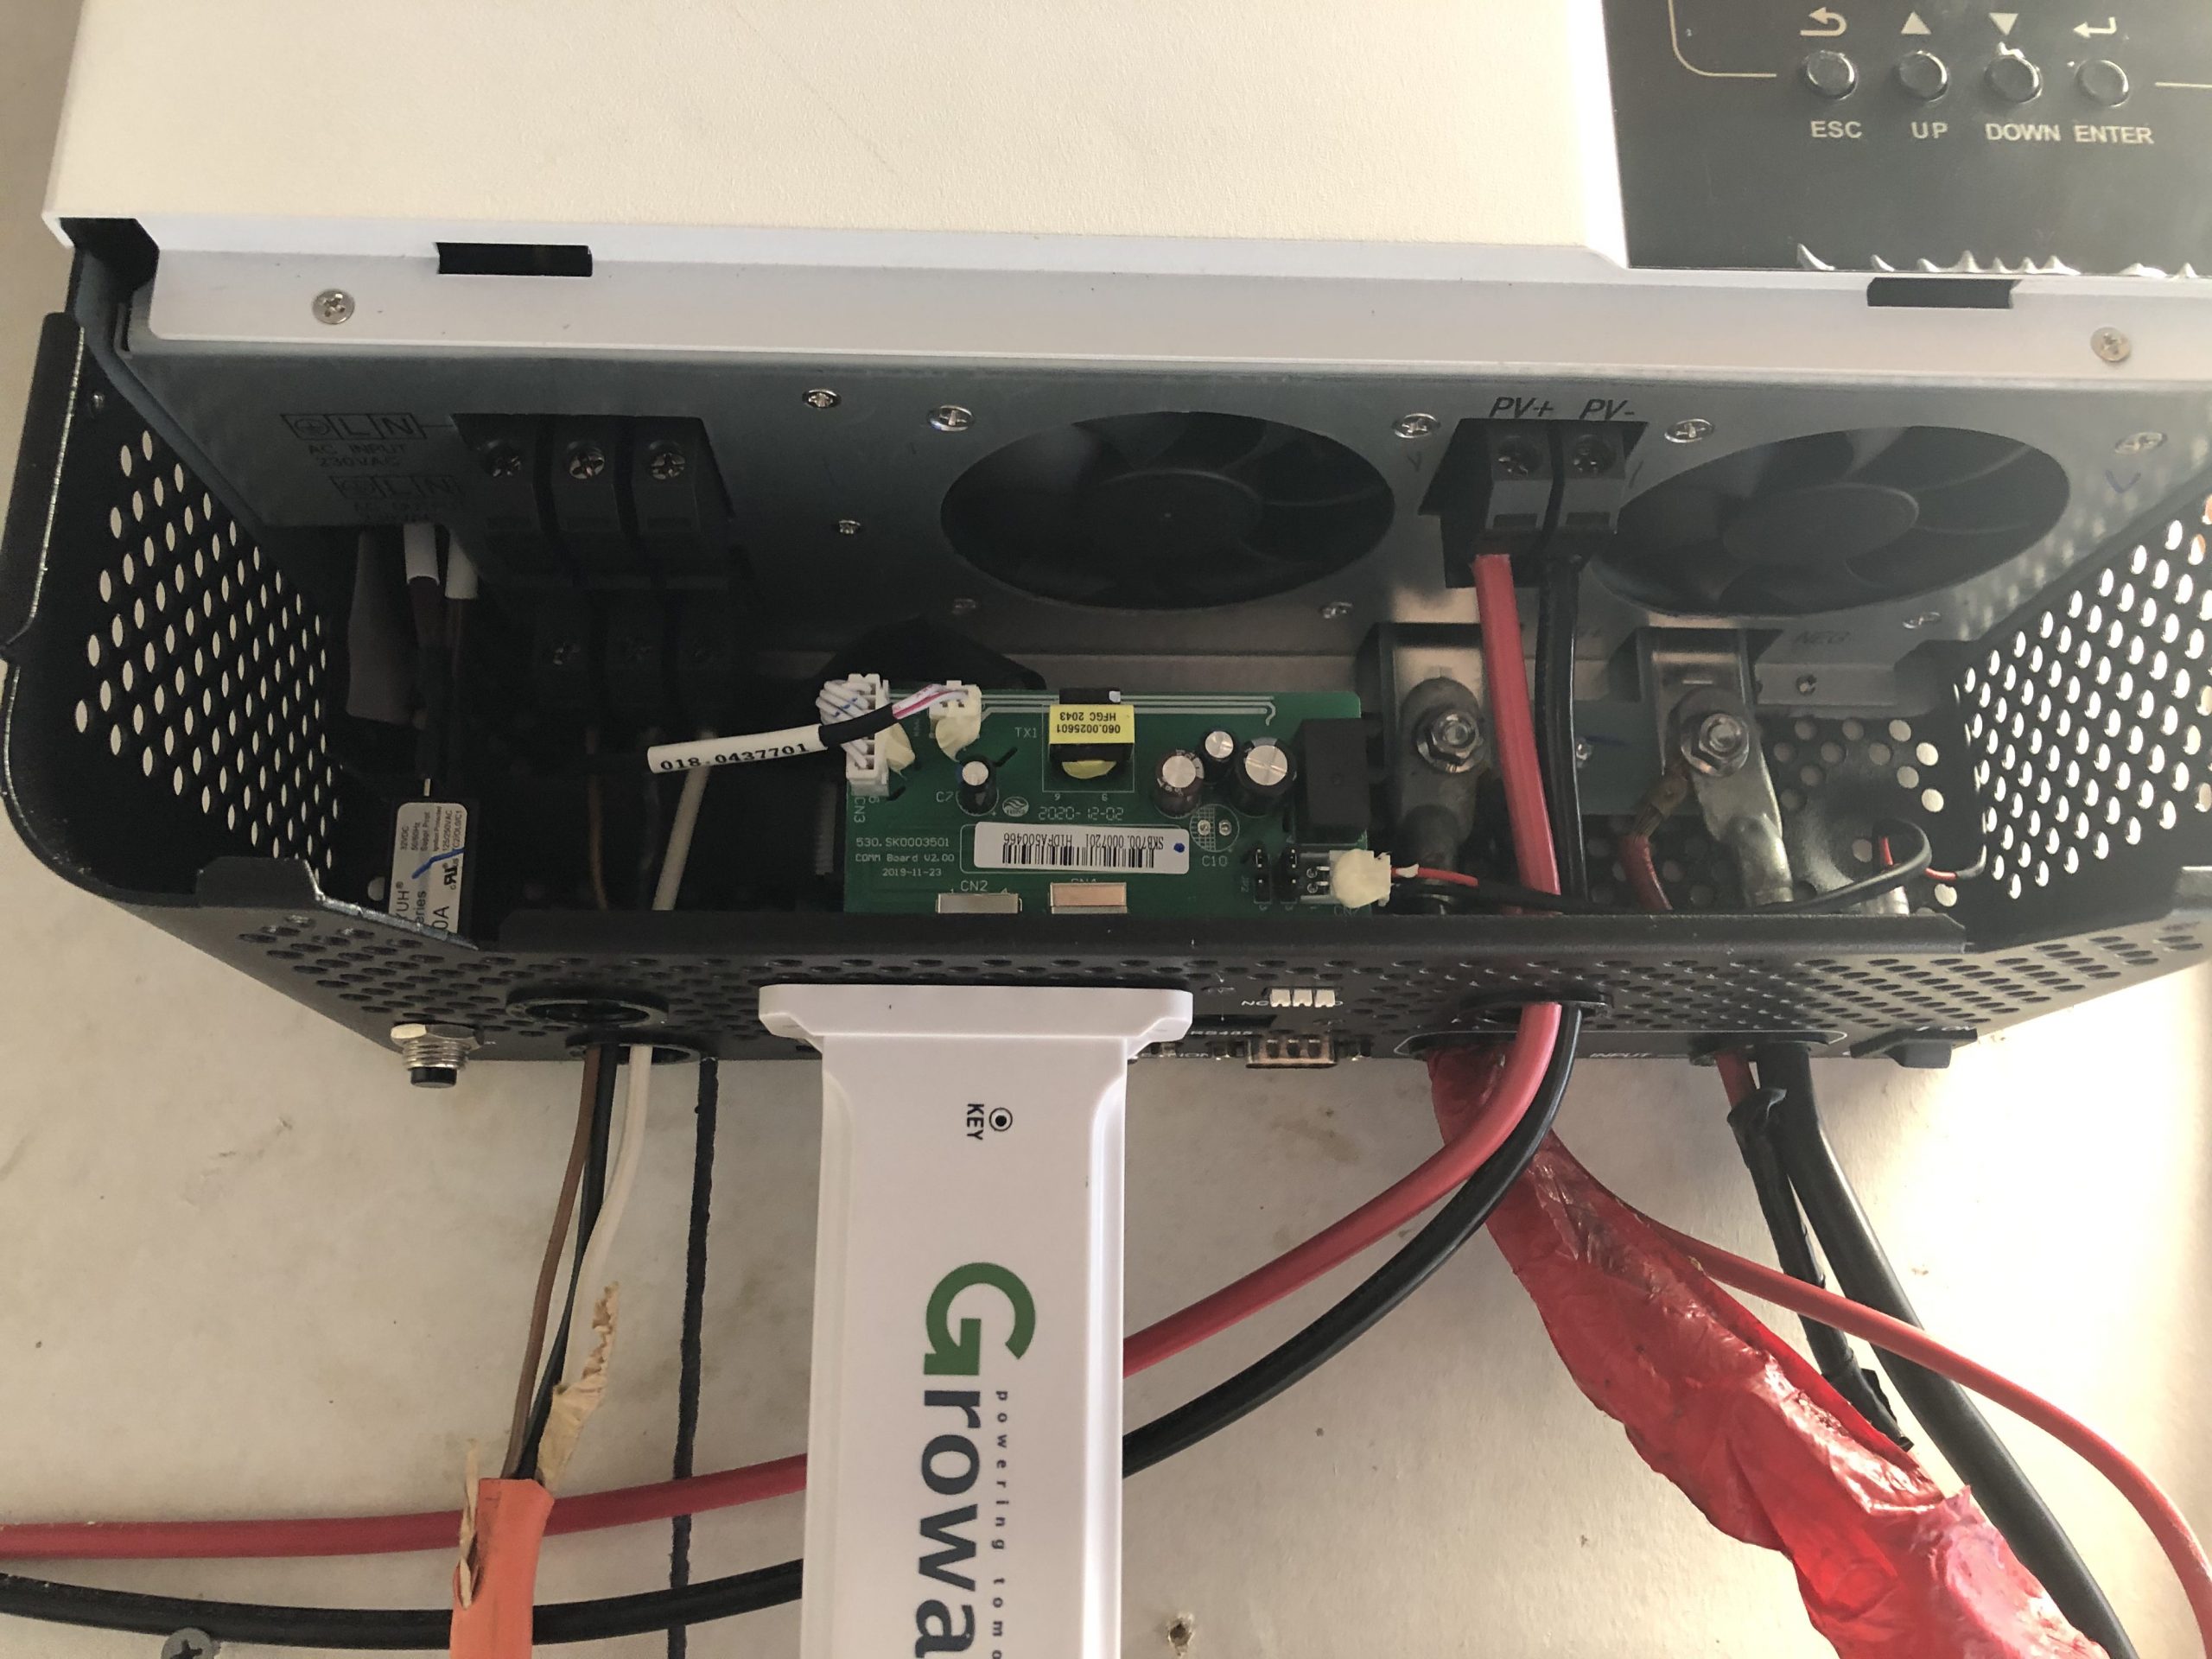
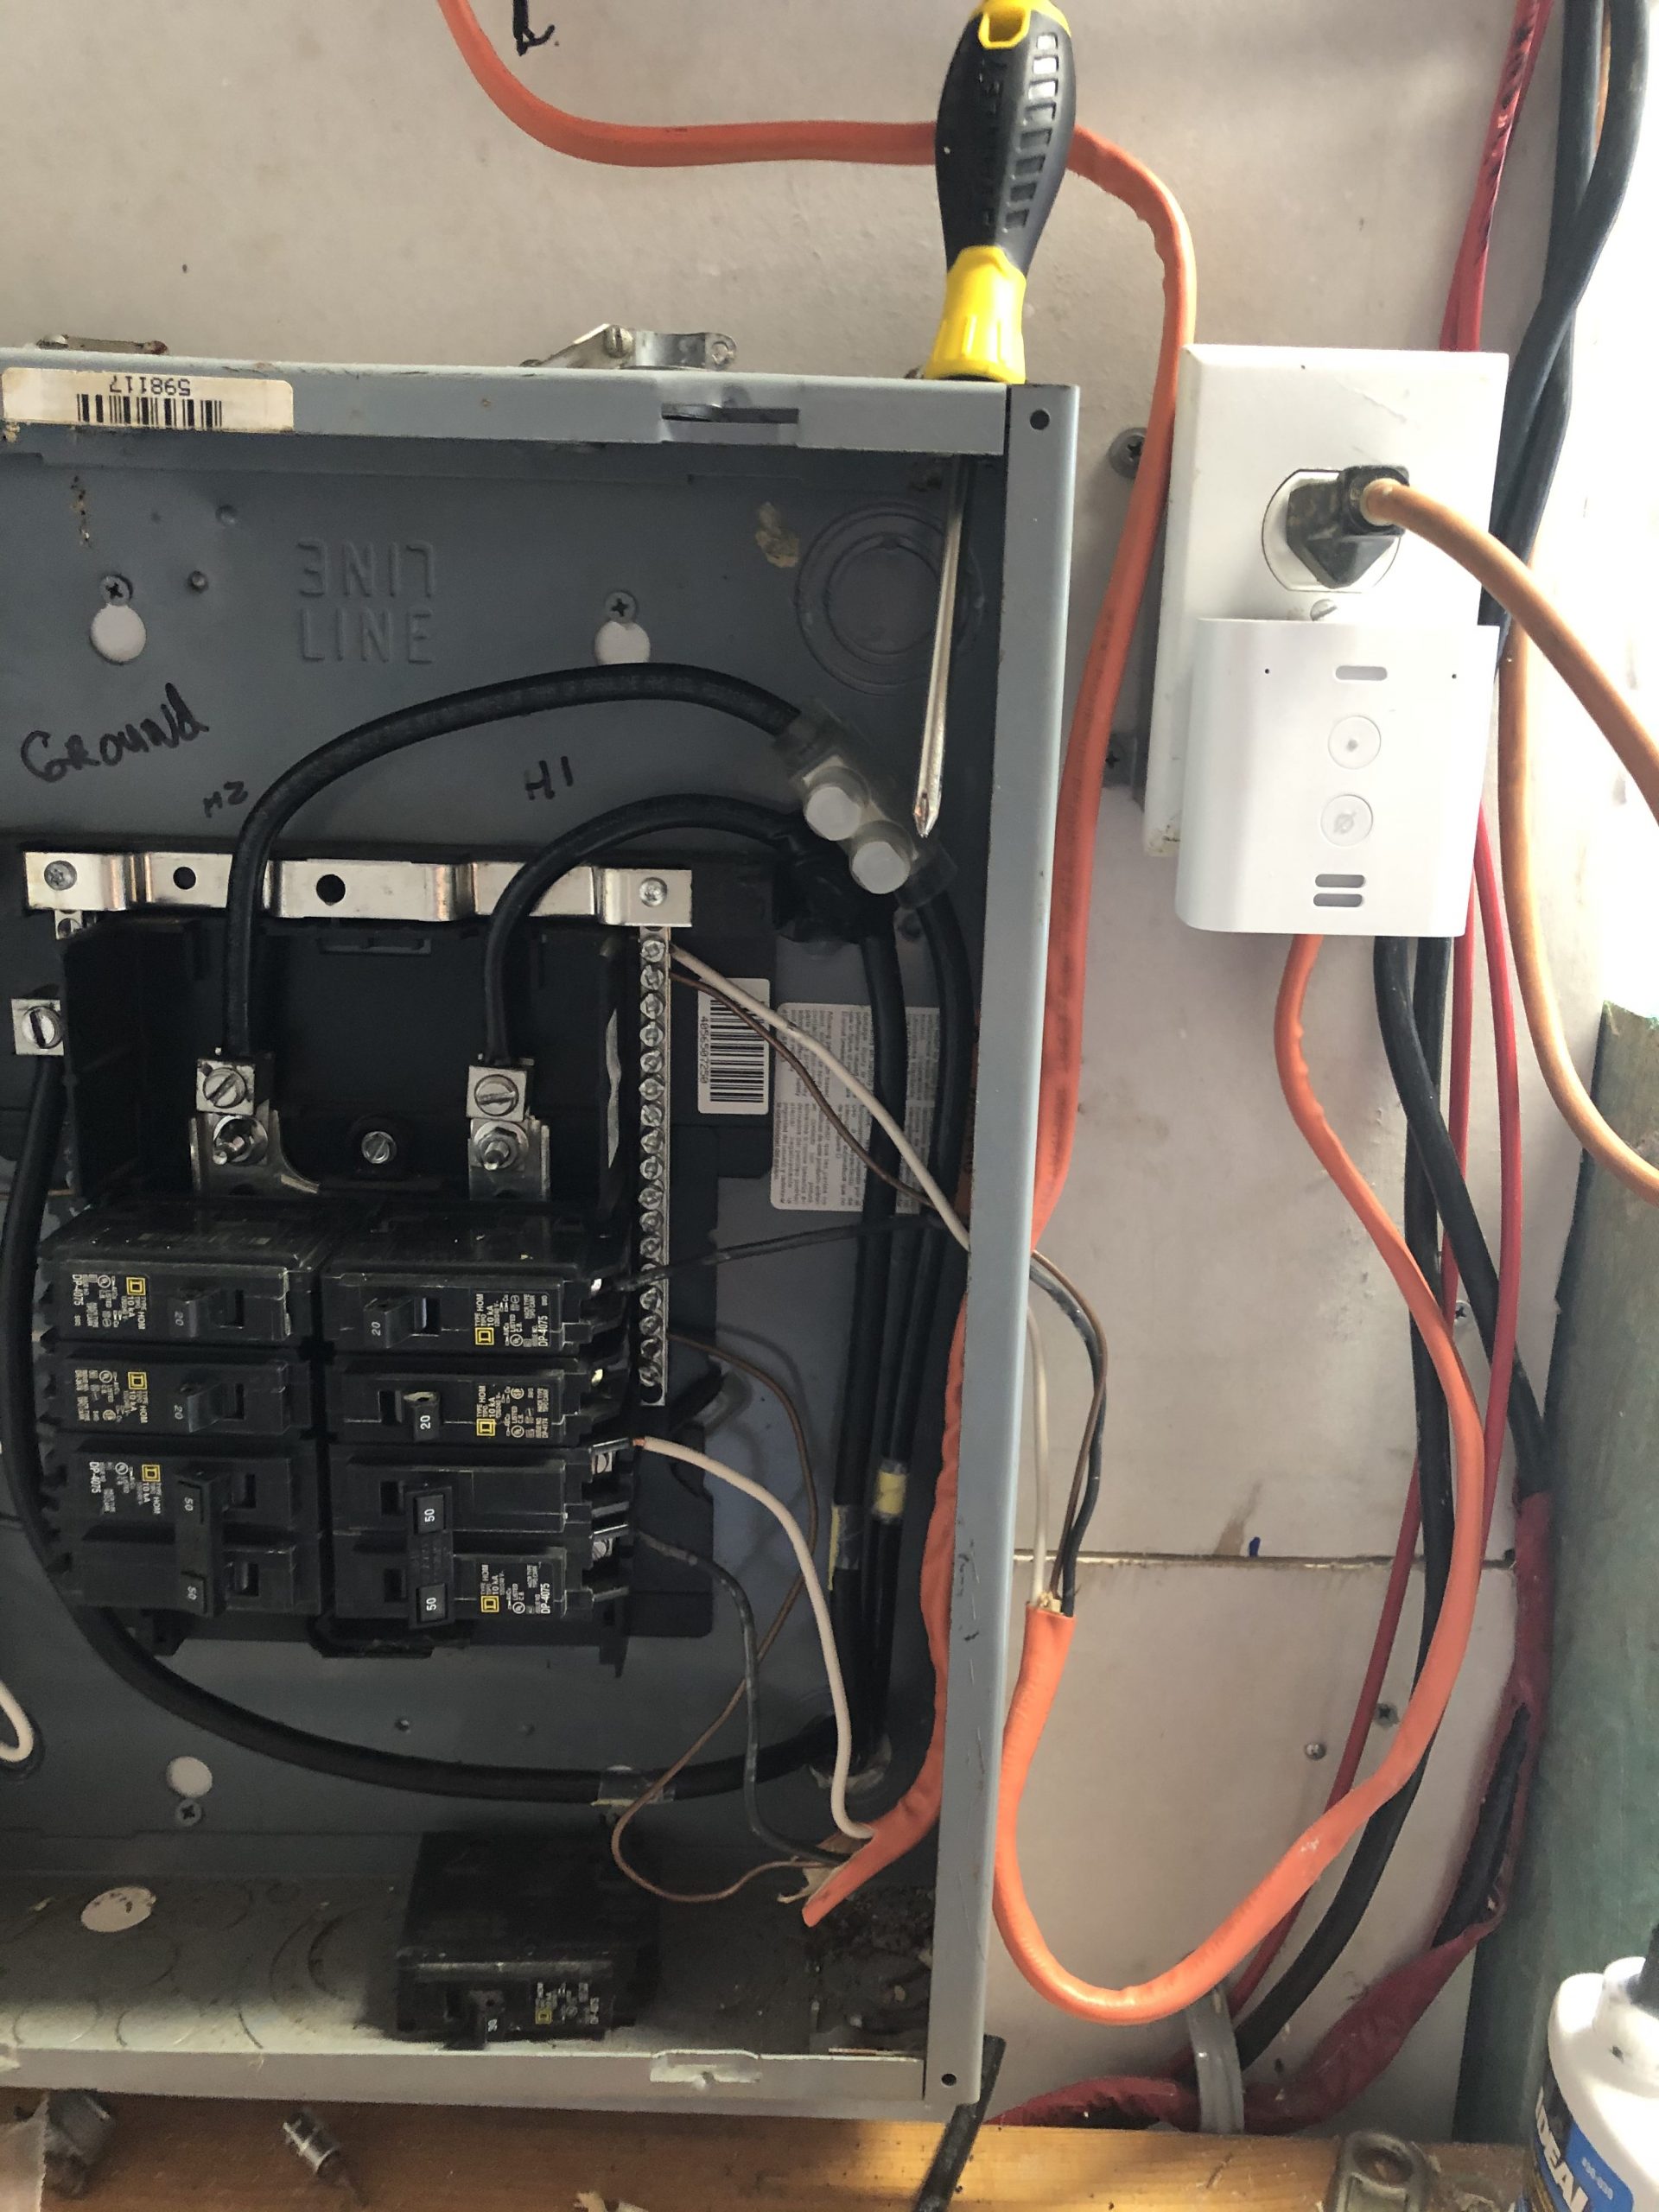
- The wifi dongle (white plastic thing in Photo 3) is a beast to setup! One of the benefits of this inverter is that you don’t have to stand over it to keep an eye on it. Unfortunately, the wifi adapter instructions are kinda vague at best. But i finally got it to connect and its working great! What you need to do is
1) press the key button to make the dongle into a hot spot and connect to the dongle itself “192.168.10.100”
2) configure the dongle to connect to your wifi (select your wifi network and enter your password)./
3) the part that’s not in the manual and the whole secret sauce go back to the dongle and you have to tell it to connect to a different server i think default is server.growatt.com or something like that you need to change it to server-us.growatt.com and magically it will start working
hopefully this helps somebody and keeps them from wasting a day trying to figure out where you messed up.
When first setup, the wifi defaults to talking to a server overseas. However, the APP on your phone know that you are in the US so the Phone APP defaults to the US server. These steps correct that.More if on the Wifi stick is at https://tennesseevalleysolar.com/growatt-wifi-2/
